
Kotlin Advent Calendar 2022

本記事はKotlin Advent Calendar 2022 の21日目の記事です。
概要
クリスマスといえばプレゼント。
ということでECサイトを作ってみます。
ECサイトと言いつつもあまり複雑なことはせずに、Stripeから取得した商品情報を表示する画面を作るところまでやります。
本画面を実装する過程で、APIを経由した情報のやりとり→受け取った情報を画面に表示するところまで触れます。
よって、本記事を読めばKotlinで外部API(主にStripe)を使ったシステムの実装イメージをざっくり掴めると思います。
ただただKotlinで作るだけではなくて、個人的にこれまで触ったことないフレームワークやサービスを使ってみたいと思っています。
個人的にこれまで触ったことない
あたかもKotlinは触ったことあるような言い方ですが、私はこれまでGo中心のエンジニア人生でした。
したがって、そもそもKotlin自体あまり触ったことがないです←
Kotlinのお作法を守れていないところもあると思いますが、こんな感じで作れるのかぁとイメージしてもらえると幸いです。
では、採用技術を紹介したら、さっそくECサイトを作っていこうと思います。
⚠️ 本記事内に記載するコードはpackageやimport周りのコードを省略しています。
コード全体を見たい場合は以下のリポジトリにコードを置いているのでこちらを参照ください。
https://github.com/yyh-gl/ktor-shop/
採用技術
- Webフレームワーク:Ktor
- テンプレートエンジン:FreeMarker
- 決済および商品管理:Stripe
- DI:Koin
Hello World
まずは「Hello World」していきます。
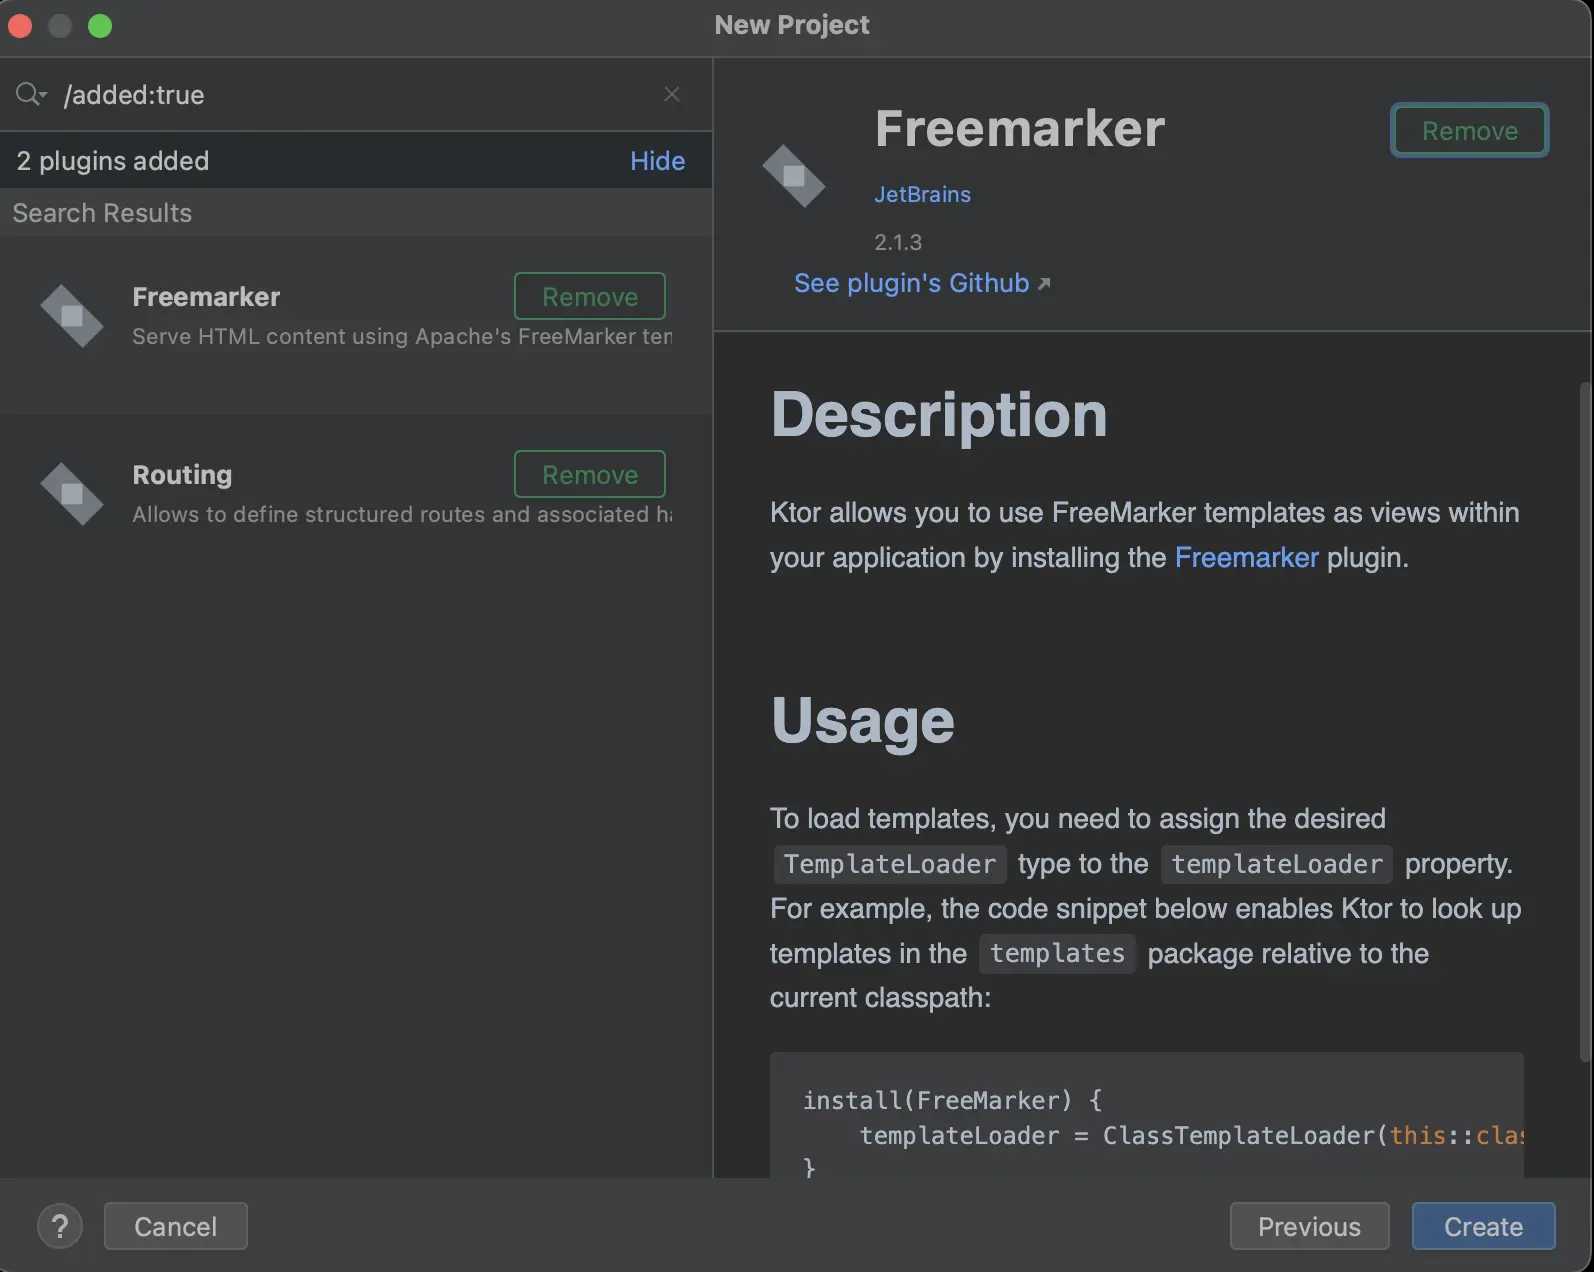
プロジェクトの作成は下記公式サイトに記載の手順を参考にしてください。
https://ktor.io/docs/intellij-idea.html#create_ktor_project
インストールしたプラグインは以下のとおりです。
コードがひととおりできあがったら下記コマンドを実行しサーバーを起動します。
$ ./gradlew run
サーバーが起動したら http://localhost:8080/ にアクセスします。
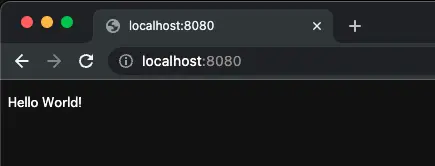
「Hello World!」を表示できました。
Auto-reloadの有効化
開発していく上ではAuto-reloadがあった方が便利なのでAuto-reloadを有効にしていきます。
Auto-reloadを有効化する手順は以下のとおりです。
- developmentモードを有効化
- 継続的なビルドを実行
$ ./gradlew -t build - サーバーを起動
$ ./gradlew run
サーバー起動手順がHello Worldのときよりも2つ増えています。
詳しく見てみましょう。
1. developmentモードを有効化
developmentモードを有効にする方法はいくつかあります。
今回はEngineMainを使った方法を紹介します。
生成されたコードではembeddedServerを使ってサーバーを起動しているのでEngineMainに変更します。
(EngineMainおよびembeddedServerの違いはこちら
)
// ktor-shop/src/main/kotlin/com/example/Application.kt

fun main(args: Array<String>): Unit = EngineMain.main(args)

fun Application.module() {
    configureRouting()
}続いて設定ファイルを追加します。src/main/resources配下にapplication.confを設置します。
// ktor-shop/src/main/resources/application.conf

ktor {
    application {
        modules = [ com.example.ApplicationKt.module ]
    }

    development = true
    deployment {
        port = 8080
        watch = [ classes, resources ]
    }
}embeddedServerに渡していた設定情報と同様にモジュールやポートなどの設定が記載されています。
特筆すべきはdevelopment = trueおよびwatch = [ classes, resources ]です。
development = trueでdevelopmentモードを有効化しています。
developmentモードが無効だとAuto-reloadは有効になりません。
watch = [ classes, resources ]はAuto-reloadの監視対象を指定しています。
(参考
)
EngineMainはデフォルトで
resourcesディレクトリ配下のapplication.confまたはapplication.yamlを参照するので、
以上の作業でdevelopmentモードが有効になります。
(参考
)
2. 継続的なビルドを実行 $ ./gradlew -t build
多くのWebフレームワークは設定をいじれば簡単にAuto-reloadが有効になりますが、
Ktorではもうひと作業必要になります。
それが継続的なビルドです。
作業としてはシンプルで下記コマンドを実行するだけです。
$ ./gradlew -t build
-tが継続的なビルドを有効にするオプションです。
コードに変更があるたびにビルドし直すから「継続的なビルド」です。
ここまでできたら再度サーバーを起動してみましょう。
$ ./gradlew run
(./gradlew -t buildも実行したまま)
「Hello World!」が表示されているはずです。
コードを変更してみましょう。
// ktor-shop/src/main/kotlin/com/example/plugins/Routing.kt

fun Application.configureRouting() {

  routing {
    get("/") {
      call.respondText("Hello World2!")
    }
  }
}
ブラウザをリロードしてみると以下の通り表示が変化しました。
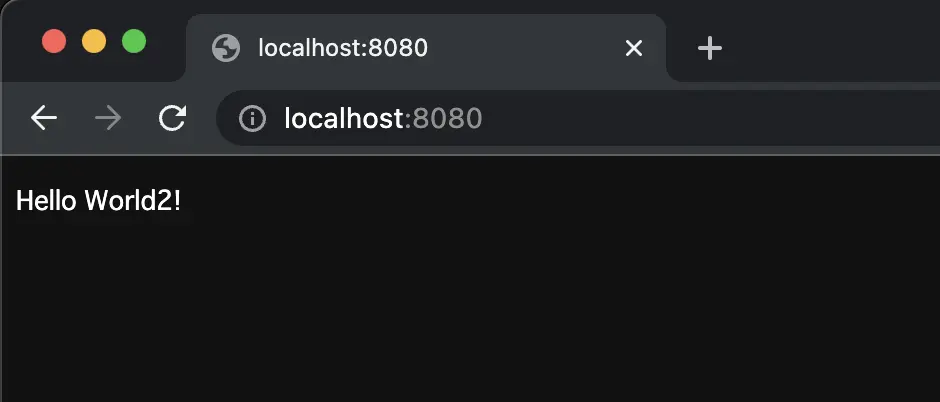
うまくAuto-reloadできていますね。
実装物のイメージを共有
テンプレートエンジンのFreeMarker
を使いながら
これから作ろうとしているもののイメージを共有します。
まずはテンプレートを作成します。
// ktor-shop/src/main/resources/templates/contents.ftl

<html>
  <body>
  <#list contents as content>
    <div>
      ${content.id}
      ${content.name}
      ${content.price}
    </div>
  </#list>
  </body>
</html>
<#list contents as content>でテンプレートに渡したcontentsの中身をひとつずつ取り出します。
そして
${content.id}
${content.name}
${content.price}にてid, name, price情報を表示します。
次にテンプレートに値を渡します。Routing.ktを以下の通り変更します。
// ktor-shop/src/main/kotlin/com/example/plugins/Routing.kt

data class Content(val id: Int, val name: String, val price: Int)

fun Application.configureRouting() {
  routing {
    get("/") {
      val contents: List<Content> = listOf(
        Content(1, "赤ペン", 100),
        Content(2, "青ペン", 200),
      )
      call.respond(FreeMarkerContent("contents.ftl", mapOf("contents" to contents)))
    }
  }
}商品情報(contents)は一旦ハードコーディングしておきます。
call.respond(FreeMarkerContent("contents.ftl", mapOf("contents" to contents)))にてcontents.ftlにcontentsを渡した上でレスポンスを処理しています。
結果として表示されるのが以下の画面です。
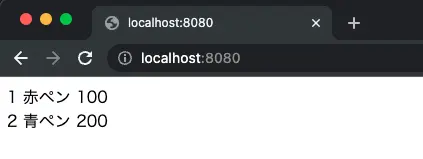
商品情報がひとつずつ表示されています。
今回はこれ以上UIにこだわることはしません←
ここまででベースとなるコードおよび開発しやすい環境が整い、
これから作っていくもののイメージを共有しました。
次章からStripe経由で商品情報を取得できるようにしていきます。
商品登録(Stripe)
Stripeに販売する商品の情報を登録します。
(アカウント登録は省略します)
『商品』ページから『商品を追加』をクリックし
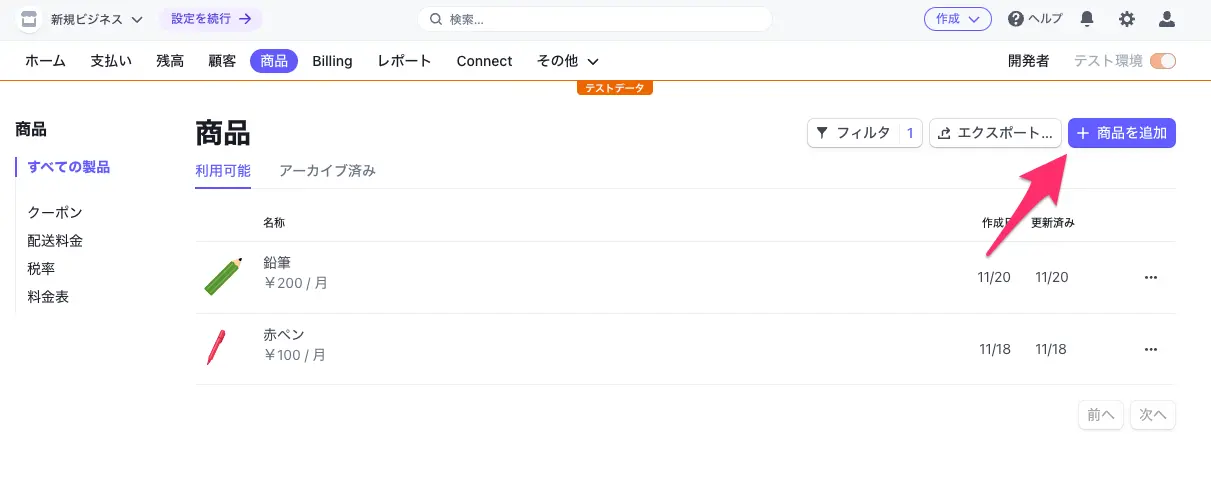
商品情報を入力して『商品を保存』すると
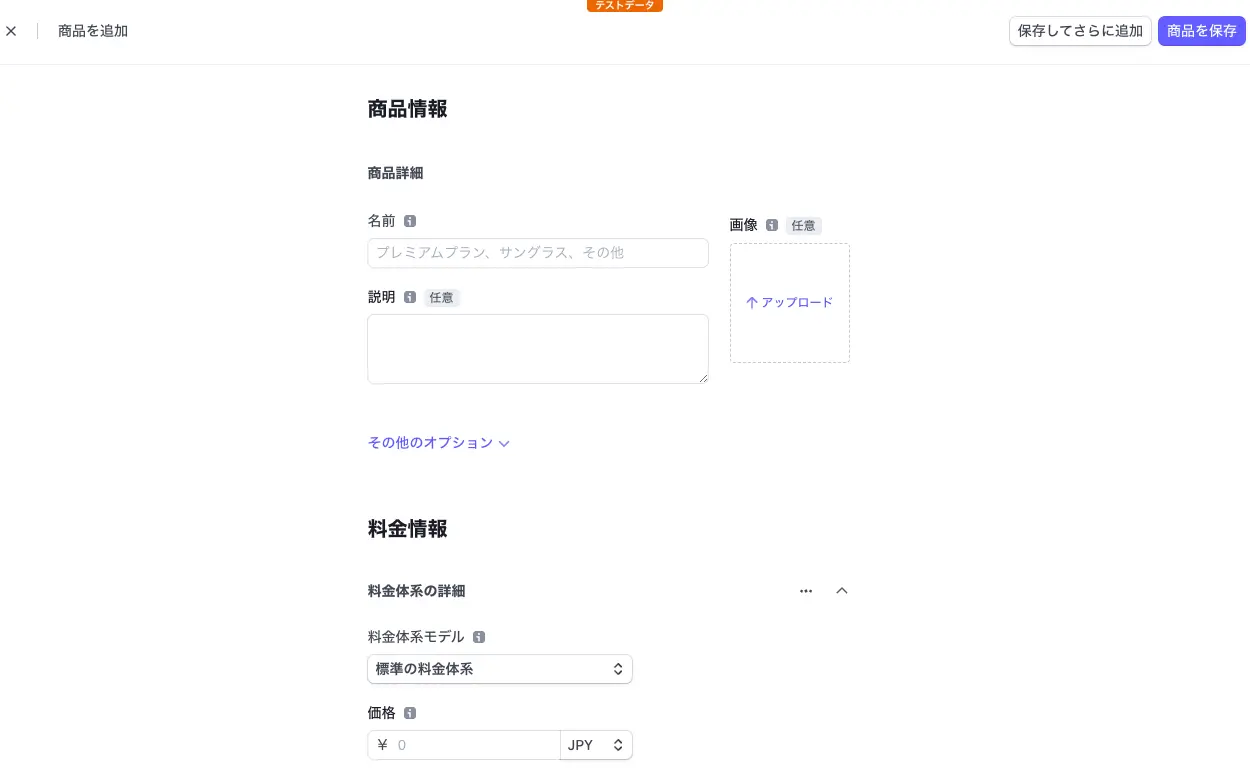
登録した商品が追加されます。
商品登録は以上でOKです。
ではさっそくコードを変更していきましょう。
商品情報の取得
今回はただ実装するだけでなく、ある程度レイヤーを分けて実装してみようと思います。
各層を順に作っていき、最終的に商品情報をStripeから取得できるようにします。
ディレクトリ構成は以下のとおりです。
(src配下だけ表示)
src
└── main
    ├── kotlin
    │   └── com
    │       └── example
    │           ├── Application.kt
    │           ├── contoroller
    │           ├── domain
    │           ├── infrastructure
    │           ├── plugins
    │           └── usecase
└── resourcescontrollerをui、usecaseをapplicationなどとしているところもあると思いますが、
比較的よく見かけるレイヤー分けかなと思います。
レイヤーごとにモジュールを分ける構成(マルチモジュール)もありますが、 今回はディレクトリを分けることでレイヤーを分離しています。
下記の記事はマルチモジュールが本題ではないのですが、
マルチモジュール化の手順や要点などが載っているのでおすすめです。
『なんとなく使わないGradle|マルチモジュール化』
(今年のアドベントカレンダー記事ということもあって参照)
Controller層を追加
『実装物のイメージを共有』の章ではルーティング処理で全ての処理を完結させていました。
このままではルーティング処理がすごく見づらくなってしまうので、まずはそこを直していこうと思います。
// ktor-shop/src/main/kotlin/com/example/plugins/Routing.kt

fun Application.configureRouting() {
    routing {
        get("/") {
            val contentController = ContentController()
            val contents: List<Content> = contentController.list()
            call.respond(FreeMarkerContent("contents.ftl", mapOf("contents" to contents)))
        }
    }
}
処理の一部をController層に移動しました。
ルーティング処理は今はまだ行数が少ないので見た目の変化が少ないですが、 必要なデータを受け取ってテンプレートに渡すだけになり、若干処理が見やすくなりました。
Controller層を実装していきましょう。
// ktor-shop/src/main/kotlin/com/example/contoroller/contents/ContentController.kt

data class Content(val id: Int, val name: String, val price: Int)

class ContentController() {
    fun list(): List<Content> {
        return listOf(
            Content(1, "赤ペン", 100),
            Content(2, "青ペン", 200),
            Content(3, "黄ペン", 300),
        )
    }
}
Controllerは画面表示に必要な情報を適切な形式で返します。
ここでも商品情報は一旦ハードコーディングです。
では、画面を見てみます。
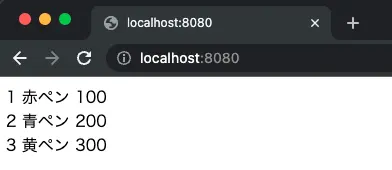
黄ペンが増えており、Controllerからデータを返せていることが確認できました。
UseCase層およびDomain層を追加
次にドメイン知識を分離した上で、ユースケース単位で処理を分離していきます。
なお、今回のサンプルではドメイン知識といえる「なにか」を見いだせませんでした。
よって、エンティティはただのデータの詰め物となっています。
// ktor-shop/src/main/kotlin/com/example/contoroller/contents/ContentController.kt

data class ContentView(
    val id: Int,
    val name: String,
    val price: Int
) {
    companion object {
        fun of(content: Content): ContentView {
            return ContentView(
                id = content.id,
                name = content.name,
                price = content.price,
            )
        }
    }
}

data class ContentsView(
    val values: List<ContentView>,
) {
    companion object {
        fun of(contents: List<Content>): ContentsView {
            return ContentsView(
                values = contents.map { ContentView.of(it) }
            )
        }
    }
}

class ContentController(
    private val listContentUseCase: ListContentUseCase
) {
    fun list(): ContentsView {
        return ContentsView.of(listContentUseCase.execute())
    }
}
Controllerを変更してみました。
以下の通りUseCase経由でデータを取得しています。
fun list(): ContentsView {
    return ContentsView.of(listContentUseCase.execute())
}
戻り値はViewのために用意したdata classに置き換えています。
こうすることで表示のために必要なデータがUseCase以降のデータ構造(や処理)に不必要に依存することを防ぎます。
(逆もしかり)
UseCaseを実装していきます。
// ktor-shop/src/main/kotlin/com/example/usecase/ListContentUseCase.kt

class ListContentUseCase {
    fun execute(): List<Content> {
        return listOf(
            Content(1, "赤ペン", 100),
            Content(2, "青ペン", 200),
            Content(3, "黄ペン", 300),
        )
    }
}今回UseCaseの戻り値には後ほど示すContentエンティティを使用しています。
UseCase層の戻り値用にdata classを用意するやり方もあると思いますが、
今回は詰め替えのコードを省略するためにこうしました。
詳細な実装は後の章に任せます。
Contentエンティティは以下のとおりです。
// ktor-shop/src/main/kotlin/com/example/domain/entity/Content.kt

class Content (
    val id: Int,
    val name: String,
    val price: Int,
)
ドメイン知識をなにも表現できていないので良くない実装ですが、 全体的な実装のイメージを共有することが目的なのでこれでOKとします。
最後に依存関係を解決します。
DIまわりのライブラリは一旦使用せず、愚直に依存関係を解決していきます。
// ktor-shop/src/main/kotlin/com/example/plugins/Routing.kt

fun Application.configureRouting() {
    routing {
        get("/") {
            val listContentUseCase = ListContentUseCase()
            val contentController = ContentController(
                listContentUseCase = listContentUseCase
            )
            val contents: ContentsView = contentController.list()
            call.respond(FreeMarkerContent("contents.ftl", mapOf("contents" to contents.values)))
        }
    }
}
ここまで来たら画面を確認してみます。
前回確認時と同じレスポンスを受け取ることができました。
Infrastructure層を追加
最後にInfrastructure層を実装していきます。
まずはStripeとの通信を省いて簡略化した処理を実装していきます。
UseCase層を以下のとおり変更します。
// ktor-shop/src/main/kotlin/com/example/usecase/ListContentUseCase.kt

class ListContentUseCase(
    private val contentRepository: ContentRepository,
) {
    fun execute(): List<Content> {
        return contentRepository.listAll()
    }
}
Repository経由でデータを取得するようにしました。
Repositoryは以下のとおりです。
// ktor-shop/src/main/kotlin/com/example/domain/repository/ContentRepository.kt

interface ContentRepository {
    fun listAll(): List<Content>
}
Domain層にはInterfaceだけ置き、実装は次に示すとおりInfrastructure層に置きます。
// ktor-shop/src/main/kotlin/com/example/infrastructure/dao/ContentRepositoryImpl.kt

class ContentRepositoryImpl: ContentRepository {
    override fun listAll(): List<Content> {
        return listOf(
            Content(1, "赤ペン", 100),
            Content(2, "青ペン", 200),
            Content(3, "黄ペン", 300),
        )
    }
}
Interfaceをかましているのは依存の方向を逆転させるためです。
この辺は下記の記事で詳細を説明していますので、興味があればご参照ください。
『【Go + レイヤードアーキテクチャ】DDDを意識してWeb APIを実装してみる』
手抜きDIして準備完了です。
// ktor-shop/src/main/kotlin/com/example/plugins/Routing.kt

fun Application.configureRouting() {
    routing {
        get("/") {
            val contentRepository = ContentRepositoryImpl()
            val listContentUseCase = ListContentUseCase(contentRepository)
            val contentController = ContentController(
                listContentUseCase =  listContentUseCase
            )
            val contents: ContentsView = contentController.list()
            call.respond(FreeMarkerContent("contents.ftl", mapOf("contents" to contents.values)))
        }
    }
}
画面を確認してみます。
これまでと同様にデータを表示できています。
Infrastructure層を本実装
お待たせしました。
Stripeから商品情報を取得していきます。
まずはStripe APIのクライアントを実装します。
// ktor-shop/src/main/kotlin/com/example/infrastructure/api/StripeClient.kt

@Serializable
data class ListProductsResponse(
    val url: String,
    @SerialName("object") val obj: String,
    @SerialName("has_more") val hasMore: Boolean,
    val data: List<ContentDTO>,
)

@Serializable
data class ContentDTO(
    val id: String,
    @SerialName("object") val datumObject: String,
    val name: String,
    val url: String? = null,
    val active: Boolean,
    val attributes: List<String?>,
    @SerialName("default_price") val defaultPrice: String,
    val description: String? = null,
    val images: List<String>,
    val livemode: Boolean,
    val metadata: Map<String, String>,
    @SerialName("package_dimensions") val packageDimensions: String? = null,
    val shippable: Boolean? = null,
    @SerialName("statement_descriptor") val statementDescriptor: String? = null,
    @SerialName("tax_code") val taxCode: String? = null,
    val type: String,
    @SerialName("unit_label") val unitLabel: String? = null,
    val created: Long,
    val updated: Long,
)

@Serializable
data class ListPricesResponse(
    val url: String,
    @SerialName("object") val obj: String,
    @SerialName("has_more") val hasMore: Boolean,
    val data: List<PriceDTO>,
)

@Serializable
data class PriceDTO(
    @SerialName("product") val productId: String,
    @SerialName("unit_amount") val unitAmount: Int,
    val active: Boolean,
)

class StripeClient {
    private val client = OkHttpClient()
    private val baseRequest =
        Request.Builder()
            .addHeader("Authorization", "Bearer ${System.getenv("STRIPE_SECRET_KEY")}")
            .addHeader("ContentType", "application/x-www-form-urlencoded")
    private val jsonDecoder = Json { ignoreUnknownKeys = true }

    private fun baseUrl(): HttpUrl.Builder {
        return HttpUrl.Builder().scheme("https").host("api.stripe.com").addPathSegment("v1")
    }

    fun listAllProducts(): List<Content> {
        val listProductsRequest =
            baseRequest.url(baseUrl().addPathSegment("products").build()).get().build()
        val listProductsResponseBody = client.newCall(listProductsRequest).execute().body
        val contents =
            jsonDecoder
                .decodeFromString<ListProductsResponse>(listProductsResponseBody!!.string())
                .data

        val productIds = contents.map { it.id }
        val priceMap = listActivePriceMapByProductIDs(productIds)

        return contents.map { Content(id = it.id, name = it.name, price = priceMap[it.id]!!) }
    }

    private fun listActivePriceMapByProductIDs(productIds: List<String>): Map<String, Int> {
        var productQuery = ""
        productIds.forEachIndexed { i, id ->
            productQuery += "product:'${id}'"
            if (i < productIds.size - 1) {
                productQuery += " OR "
            }
        }

        val listPricesRequest =
            baseRequest
                .url(
                    baseUrl()
                        .addPathSegment("prices")
                        .addPathSegment("search")
                        .addEncodedQueryParameter("query", productQuery)
                        .build()
                )
                .get()
                .build()
        val listPricesResponseBody = client.newCall(listPricesRequest).execute().body
        val prices =
            jsonDecoder.decodeFromString<ListPricesResponse>(listPricesResponseBody!!.string()).data

        val priceMap: MutableMap<String, Int> = mutableMapOf()
        prices.forEach { price ->
            if (price.active) {
                priceMap[price.productId] = price.unitAmount
            }
        }
        return priceMap
    }
}全商品情報を取得するlistAllProductsと
指定商品に紐づく価格情報を取得するlistActivePriceMapByProductIDsを用意しました。
注意点として、Stripeにおける商品情報と価格情報は1:Nの関係です。
しかし、今回は有効な価格情報が1つしかないという前提のもとに実装しています。
APIリクエスト処理はokhttp3を使って実装しています。
okhttp3は有名なHTTPクライアントライブラリなので知っている方も多いでしょう。
Authorizationヘッダーの値は環境変数から取得するようにしています。
(環境変数設定方法は後ほど)
Stripeから受け取ったレスポンス(JSON)は Kotlin Serialization を使ってdata classに変換しています。
シリアライズ対象のdata classにはSerializableアノテーションを付与します。
フィールド名とキー名が一致しない(機械的にマッピングできない)場合は、
SerialNameアノテーションを使ってマッピング方法を指定します。
コードの変更を続けます。
okhttp3およびKotlin Serializationを使うためにbuild.gradle.ktsを変更します。
// ktor-shop/build.gradle.kts

plugins {
  application
  kotlin("jvm") version "1.7.21"
  kotlin("plugin.serialization") version "1.7.21"
  id("io.ktor.plugin") version "2.1.3"
}

<省略>

dependencies {
  implementation("io.ktor:ktor-server-core-jvm:$ktor_version")
  implementation("io.ktor:ktor-server-freemarker-jvm:$ktor_version")
  implementation("io.ktor:ktor-server-netty-jvm:$ktor_version")
  implementation("ch.qos.logback:logback-classic:$logback_version")
  implementation("com.squareup.okhttp3:okhttp:4.10.0")
  implementation("org.jetbrains.kotlinx:kotlinx-serialization-json:1.4.1")
  testImplementation("io.ktor:ktor-server-tests-jvm:$ktor_version")
  testImplementation("org.jetbrains.kotlin:kotlin-test-junit:$kotlin_version")
}
Infrastructure層の処理も変更します。
// ktor-shop/src/main/kotlin/com/example/infrastructure/dao/ContentRepositoryImpl.kt

class ContentRepositoryImpl(
    private val stripeClient: StripeClient,
) : ContentRepository {
    override fun listAll(): List<Content> {

        val contents = stripeClient.listAllProducts()
        return contents.map {
            Content(
                id = it.id,
                name = it.name,
                price = it.price,
            )
        }
    }
}
Stripe API経由でデータを取得するようにしました。
DI周りも変更です。
// ktor-shop/src/main/kotlin/com/example/plugins/Routing.kt

fun Application.configureRouting() {
    routing {
        get("/") {
            val stripeClient = StripeClient()
            val contentRepository = ContentRepositoryImpl(stripeClient)
            val listContentUseCase = ListContentUseCase(contentRepository)
            val contentController = ContentController(listContentUseCase = listContentUseCase)
            val contents: ContentsView = contentController.list()
            call.respond(FreeMarkerContent("contents.ftl", mapOf("contents" to contents.values)))
        }
    }
}Contentエンティティの一部型定義を間違っていたので修正します🙏
// ktor-shop/src/main/kotlin/com/example/domain/entity/Content.kt

class Content(
    val id: String,
    val name: String,
    val price: Int,
)
以上で修正は完了です。
実際に動かしてみましょう。
実行コマンドが少し変わります。
$ STRIPE_SECRET_KEY=xxx ./gradlew run
(./gradlew -t buildはそのまま実行したまま)
さきほど説明を後回しにしましたが、
Stripe APIに渡すAuthorizationヘッダーの値(STRIPE_SECRET_KEY)はここで設定しています。
設定する値は『APIキー画面』
に
記載があるシークレットキーの値です。
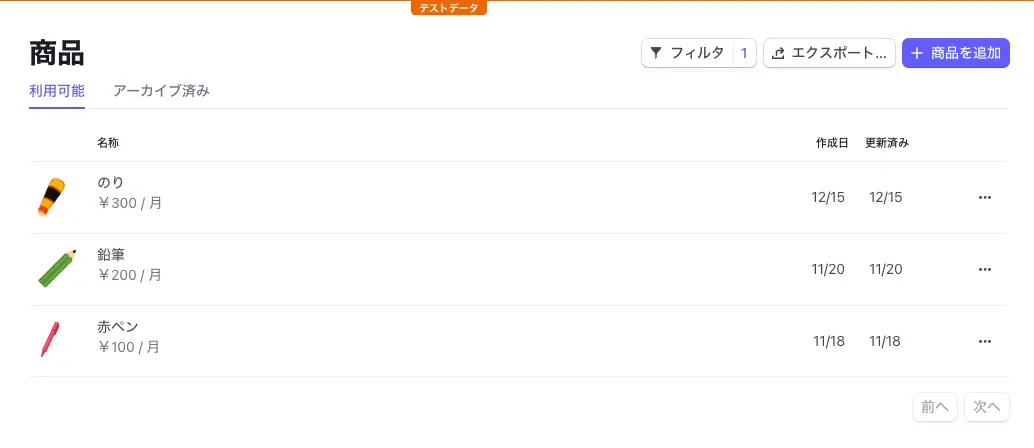
では、画面を確認します。
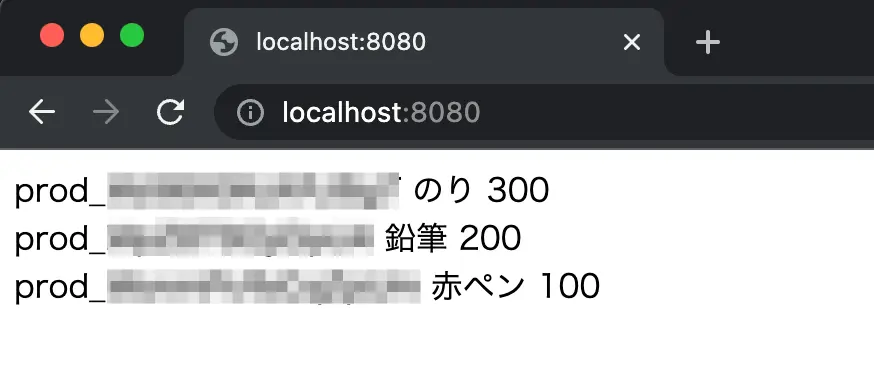
表示内容がStripeで登録した商品情報に変わりました。
以上で当初の目的であった
Stripeからの商品情報取得→表示までを実装できました。
せっかくなのでDIをきちんとやっておきます。
DI
今回はKoin を使います。
dependenciesにKoinを追加します。
// ktor-shop/build.gradle.kts

dependencies {
    implementation("io.ktor:ktor-server-core-jvm:$ktor_version")
    implementation("io.ktor:ktor-server-freemarker-jvm:$ktor_version")
    implementation("io.ktor:ktor-server-netty-jvm:$ktor_version")
    implementation("ch.qos.logback:logback-classic:$logback_version")
    implementation("com.squareup.okhttp3:okhttp:4.10.0")
    implementation("org.jetbrains.kotlinx:kotlinx-serialization-json:1.4.1")
    implementation("io.insert-koin:koin-ktor:3.2.2")
    implementation("io.insert-koin:koin-logger-slf4j:3.2.2")
    testImplementation("io.ktor:ktor-server-tests-jvm:$ktor_version")
    testImplementation("org.jetbrains.kotlin:kotlin-test-junit:$kotlin_version")
}
Koinによる依存解決方法を記述します。
// ktor-shop/src/main/kotlin/com/example/plugins/Koin.kt

fun Application.configureKoin() {
    install(Koin) { modules(appModule) }
}

val appModule = module {
    single { StripeClient() }
    single { ContentRepositoryImpl(get()) as ContentRepository }
    single { ListContentUseCase(get()) }
    single { ContentController(get()) }
}
single { Xxx() }を使ってインスタンスをどのように作るかを指定しています。
なおsingle { ContentRepositoryImpl(get()) as ContentRepository }だけ少し記述が違います。
これはContentRepository(Interface)の実体としてContentRepositoryImplを指定しているためです。
作成したApplication.configureKoin()を呼び出します。
// ktor-shop/src/main/kotlin/com/example/Application.kt

fun main(args: Array<String>): Unit = EngineMain.main(args)

fun Application.module() {
  configureKoin()
  configureTemplating()
  configureRouting()
}
手動でDIしていた箇所をKoinを使ったDIに置き換えます。
// ktor-shop/src/main/kotlin/com/example/plugins/Routing.kt

fun Application.configureRouting() {
    val contentController by inject<ContentController>()

    routing {
        get("/") {
            val contents: ContentsView = contentController.list()
            call.respond(FreeMarkerContent("contents.ftl", mapOf("contents" to contents.values)))
        }
    }
}
val contentController by inject<ContentController>()で依存を注入(inject)しています。
今回はContentControllerを使えればOKなのでContentControllerだけを注入します。
注入後はcontentController変数にインスタンスが格納されているので、
修正前と同様にcontentController.list()とすればメソッドを実行できます。
以上でKoinの導入が完了しました。
画面を確認します。
変わらず動作しますね。
TODO 〜エラーハンドリング〜
本実装ではエラーハンドリングを全くしていません。
実際のシステムではしっかりとエラーハンドリングしてやり、
ユーザーに適切なエラーレスポンスを返す必要があります。
エラーハンドリング周りはまた別で記事にしたいと考えているので公開までお待ちいただけると幸いです。
(エラーハンドリング方法が全く異なるGoと比較した記事にしたいと考えています)
まとめ
今回はKotlin + Ktorで(とても簡易的な)ECサイトを作成しました。
商品情報はStripeで管理し、API経由で情報を取得し表示しています。
本記事の内容を理解すれば、外部APIを使用したシステムの実装イメージが掴めると思います。
私がKotlin初心者なのでよりKotlinらしい書き方ができる部分も多々あると思いますが、
ざっくりの実装イメージを掴んでいただけたなら幸いです。
明日以降のアドベントカレンダーを楽しみにしながら、今回はここで終わりたいと思います。
最後まで読んでいただきありがとうございました。